How to use remote recording platforms and Set up a USB Mic

Preparing for Your Remote Interview via Cleanfeed

On the day of your interview, we want to be sure that everything goes smoothly so that you sound your best and your story comes through naturally and authentically. In order to make that happen, we ask that you complete the following steps. We will be using a piece of software called Session Link Pro to record the audio from the interview through a computer and internet connection.

Well in advance of your interview, be sure that you will have the following at your reserved time:

A quiet place where you will not be interrupted.

Current version of the Google Chrome Browser. Click here to download.

A good internet connection.

USB mic, pop filter and Headphones provided by October Films.

Plenty of available storage space (at least 20GB) on your computer’s hard drive.

Any specific information that you would like to reference during the interview.

In order to get the best quality audio, it is preferable that the interview takes place in a smaller room, with lots of soft furnishings (such as carpet) that absorb the sound. Ideally a closet, bedroom or place without reflective surfaces (such as hard wood/glass). Wide open spaces such as an open living room are also best avoided and if possible, please ensure you are not sitting directly in front of a wall as the sound will bounce off this.

At the time of your interview, please follow these steps:

Gather any reference notes you may have prepared.

Close all other apps on the computer you will be using for the interview and plug in the power cable if it’s a laptop to ensure it doesn’t run out of battery during the interview.

Silence phones and other nearby devices.

Adjust your computer so that it will not timeout during the call (screensaver, auto-lock, auto-sleep, etc.), as appropriate.

Activate Do Not Disturb on the device you will be using for the interview.

Plug in the provided USB Microphone and headphones into the headphone port of your computer.

Starting the recording session:

When you’re ready, click the Cleanfeed you will have received via your email. (Remember to open the link using the Google Chrome browser.)

Make sure that you select the “ATR2100x” as the Default Input and Output. Hit START when you are ready.

Once in the recording session, you will be connected with the Audio Producer and Director who will be able to hear you and talk you through any troubleshooting.

In case of difficulty during the session or with the set up:


Microphone Setup

step-1-how-to-set-up-mic

1.

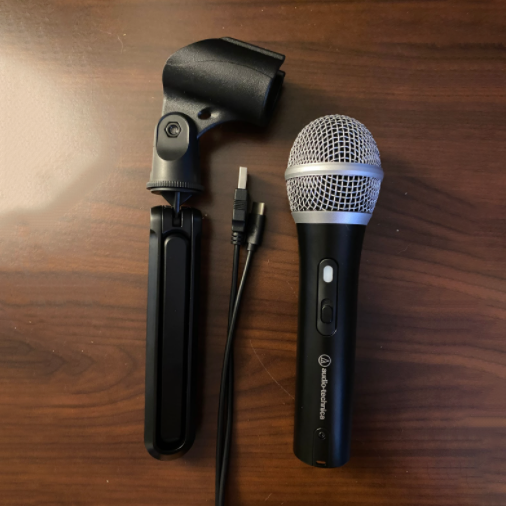
Open up the equipment package and take out the microphone, stand, and put them together.

step-2-how-to-set-up-mic

2.

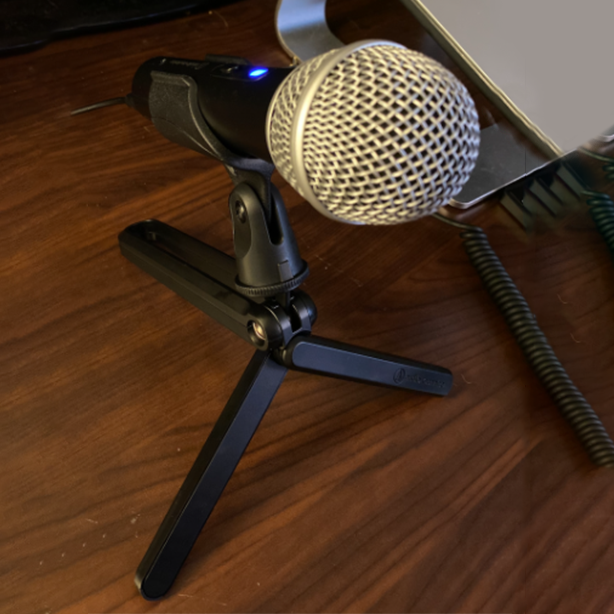
Plug the USB cable into your microphone and into your computer. Switch the microphone knob to the ON position.

step-3-how-to-set-up-mic

3.

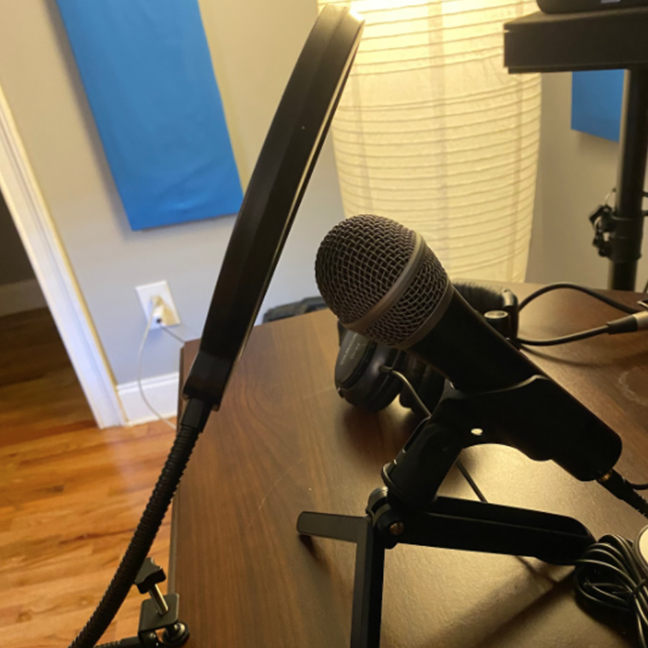
Take the pop filter and screw it to the edge of your desk. Position it so that it is 1 inch away from the microphone.

step-4-how-to-set-up-mic

4.

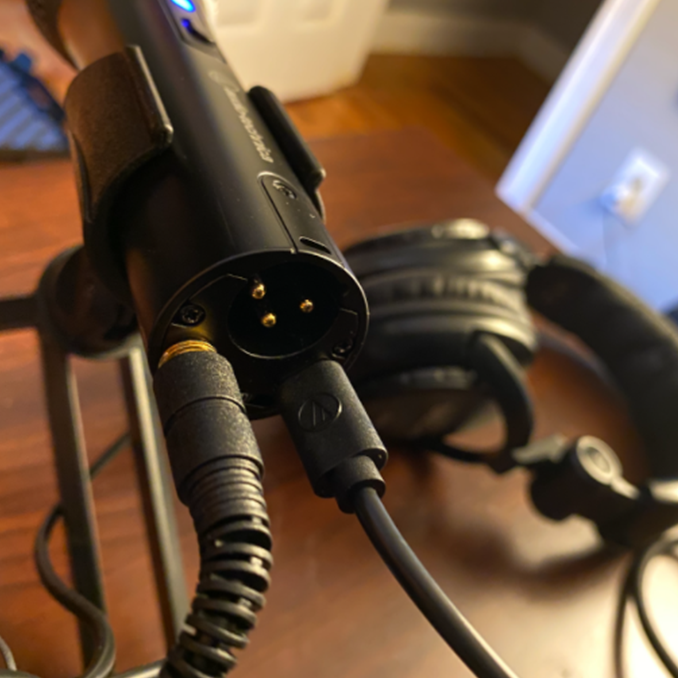
Take your headphones and plug them into the bottom of your microphone.

podcast-microphone-speaking

5.

Your mouth should be close to the microphone. At most 4 inches away.

step-6-how-to-set-up-mic

6.

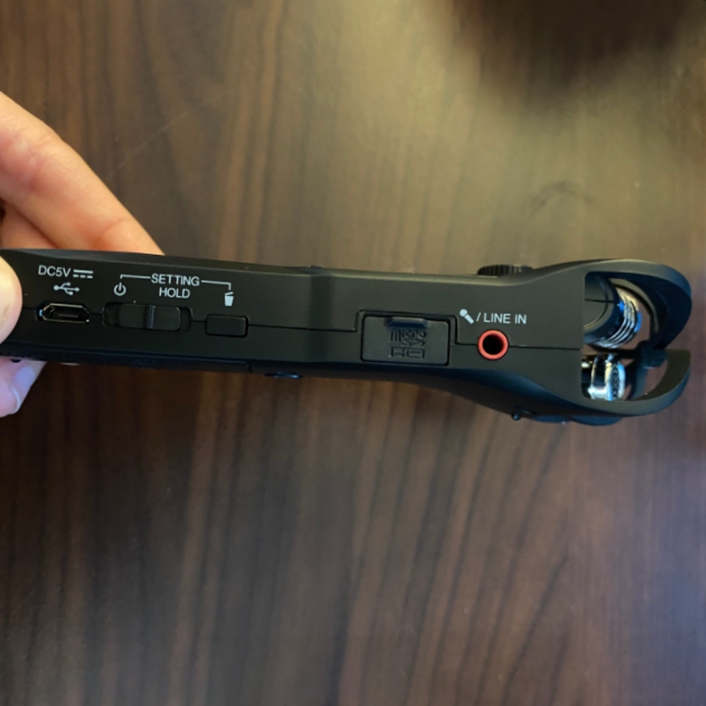
Your mouth should be close to Next, take out the Zoom recorder and turn it on.

step-7-how-to-set-up-mic

7.

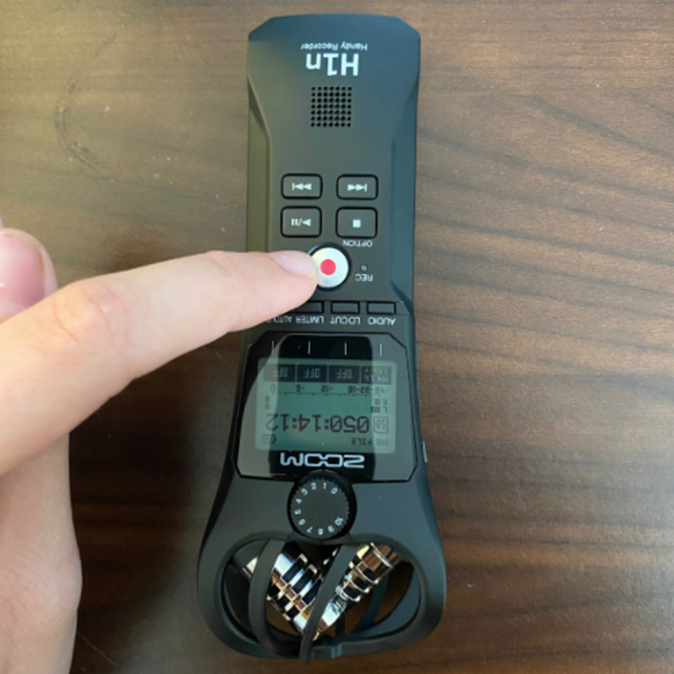
Place it on the desk with the microphones pointing towards you and hit the record button.

icon-you-did-it

YOU DID IT!

Make sure that you select the “ATR2100x” as the Default Input and Output in the Session Link Pro link. You can click the Test Button to make sure it is set up correctly. Test your set up by clicking the link in the email.